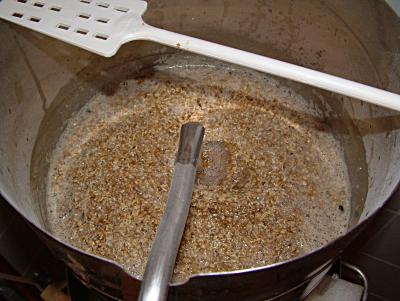
Blick in das Malzrohr View into the Malt Tube

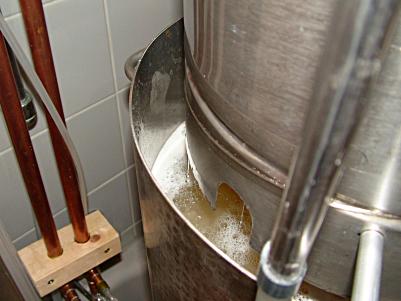
Blick in den Braukessel View into the Brewing Kettle
Der Braukessel ist hier noch ohne Wärmedämmung.
The Brewing Kettle is not insulated here (old photo).
|
Nachdem der Braukessel mit Brauwasser befüllt wurde, wird das
Malzrohr aufgesetzt. Anschließend wird die geschrotete Malz
in das Malzrohr gefüllt, die Pumpe an den Kugelhahn des Braukessels
angeschlossen, und das Einlaufrohr von der Pumpe eingehängt. Somit
sind alle Vorbereitungen abgeschlossen. Abschließend wird der
Temperaturfühler der Steuerung in den Braukessel gehängt,
ungefähr 10cm über dessen Boden.
Tip: Es hat sich gezeigt, daß ein Überlauf im Inneren bei
großer Malz-Menge sehr vorteilhaft ist. Dazu stellt man einfach
vor dem Einfüllen der Malz einen kleinen umgedrehten Trichter auf
die Siebplatte und verlängert diesen mit einem Rohrstück bis
auf die gewünschte Höhe. Dies vermeidet ein Überlaufen,
falls der Mehlanteil doch etwas zu hoch geraten, und deswegen der
Durchfluß durch die Malz zu gering ist.
Die Steuerung wird eingeschaltet und zeigt nun fortlaufend die
aktuelle Temperatur der Würze. Jetzt wird das gewünschte
Brauprofil programmiert (welche Temperatur wie lange einzuhalten ist),
und dann das Brauprogramm gestartet. Die Steuerung aktiviert nun die
Pumpe. Weiters wird die Heizung gesteuert um die erste Temperatur zu
erreichen und zu halten. Ist diese Temperatur erreicht, wird ein
Timer aktiv. Nach seinem Ablauf wird die nächste Temperaturstufe
gewählt und der Züyklus wiederholt. Ab der Beta-Amylase wird
die Heizleistung durch SPWM gedrosselt, um ein Anbrennen des
entstehenden Zuckers zu vermeiden.
Am Ende des Brauvorganges (78°C) wird die Pumpe automatisch abgeschaltet,
was ein Abläutern bewirkt. Die Würze läuft komplett in den
Braukessel zurück. Ist dies geschehen, wird der Kugelhahn zugedreht
und Pumpe+Malzrohr abgebaut.
After filling the Brewing Kettle with water, the Malt Tube is placed
on top of it. Then the prepared malt is filled in, the pump is connected
to the ball valve by using a ø18mm hose, and the return-tube coming from
the pump is hooked on the malt tube border. Finally, the temperature
sensor is hanged into the Brewing Kettle, approx. 10cm above its
bottom.
Hint: My experience shows that a run-over protection is
very helpful when using bigger quantities of malt. This can be easily
done by placing a little funnel upside down onto the sieve plate and
extending it with a tube to the wanted height before filling in
the malt. So the wort can run over there instead of outside the malt tube,
when the flour part of the wort is a little bit too high.
The next step is switching the Electronic Control (EC) on. It
permanently shows the temperature of the wort. Now the brewing profile
is programmed (which temperature for which time), then the brewing
program is started. The EC turns on the pump and the heating to reach
the first set temperature. Then a timer starts, while the temperature
is continuously regulated. When time is over, the next temperature is
set and the whole thing repeats. Here it is important that I added
SPWM from the beginning of the "Beta Anylase" to reduce the heating
power and hereby the surface temperature of the heater. If I wouldn't
do that, the sugar in the wort would caramelize and give a bitter,
smoky taste and a dark color as well (similar to "Stone Beer").
At the end of brewing (78°C), the pump is automatically switched off, which
has the effect of lautering. All wort is running back into the brewing
kettle. Then the ball valve is closed and the pump and malt tube
get removed.
|